You will build
ACME's look: a calm light theme by day, a dark one by night, a dark navbar on every page and a colour picker for visitors.
You need
- A Domma CMS site (set one up)
- Your brand's feel: light or dark, warm or cool
Good to know
Themes are complete, tested palettes - text, buttons, cards, forms and focus states all change together, and contrast is designed in.
Step 1: Choose the site theme
Go to Content > Theme. The Themes tab opens with Live now, showing what visitors and the admin see at this moment.
Under Site & admin, pick a Site theme. There are 28 public themes: 14 palettes, each in a light and a dark version - Charcoal, Ocean, Forest, Sunset, Royal, Lemon, Silver, Grayve, Mint, Unicorn, Dreamy, Christmas, Wedding and Corporate. ACME, a workshop brand, suits Charcoal Light.
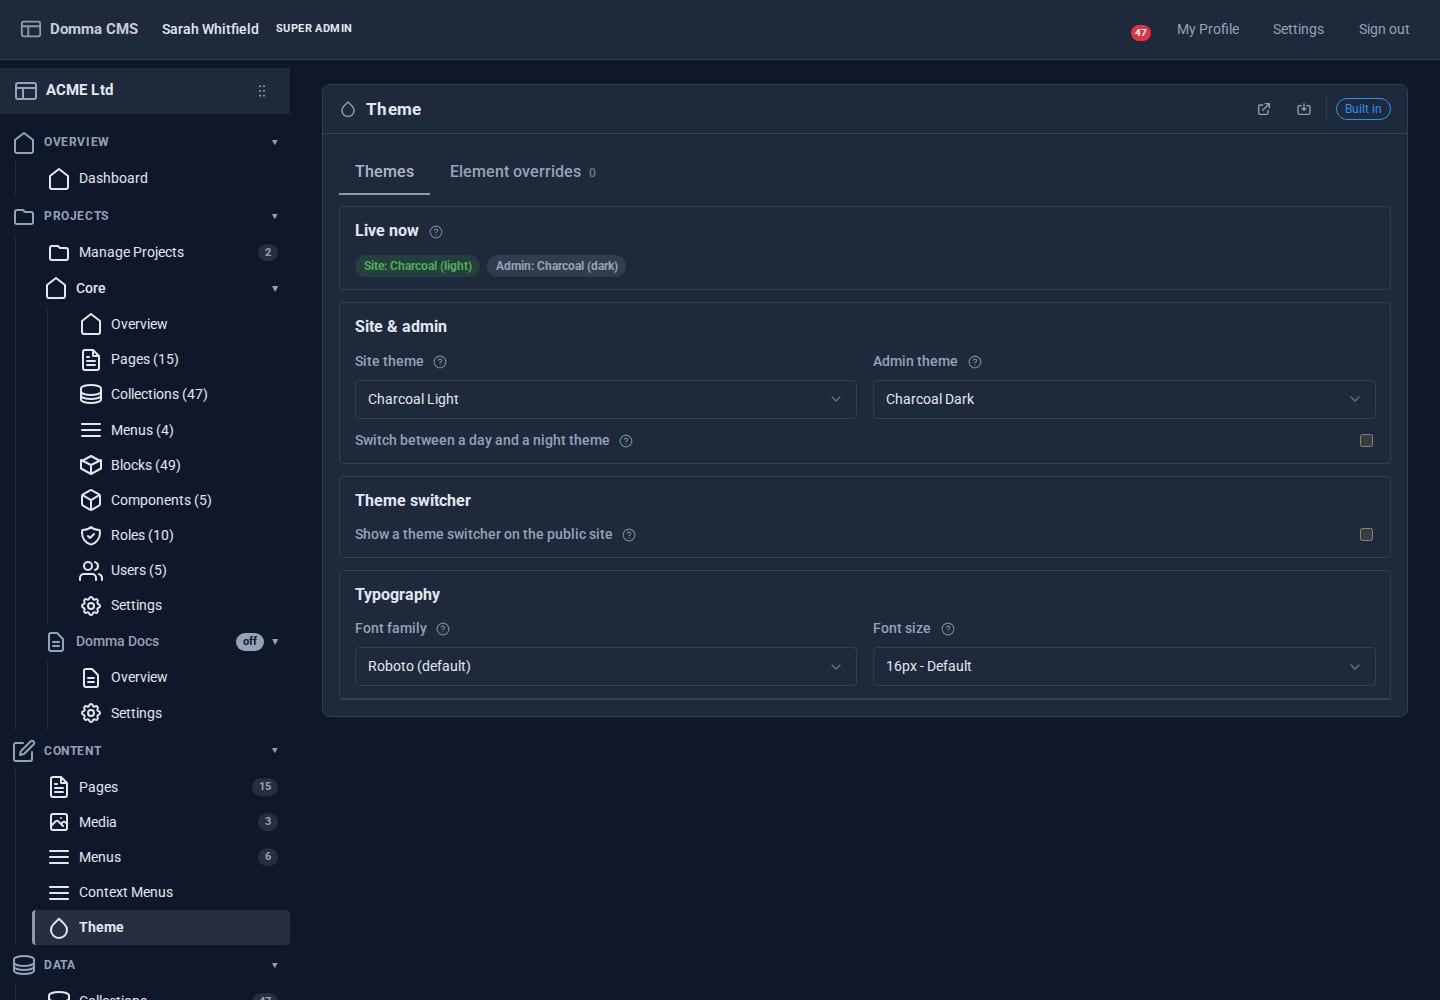
The Admin theme is separate, so your editors can work in a dark admin whatever the public site looks like. It also offers nine admin-only finishes (Sharp, Slate and Smooth, each in Indigo, Steel or Teal).
Step 2: Pick a font and size
In Typography, choose a Font family - 18 are built in, from Roboto, Inter and Lato to serif faces like Merriweather, Playfair Display and Lora, plus the reading-friendly Lexend, Atkinson Hyperlegible and Andika - and a base Font size between 13 and 20px.
Click the save button in the banner (or Ctrl+S). The change is live on the next page load.
Step 3: Switch between day and night
Tick Switch between a day and a night theme, then choose a Day theme (Charcoal Light), a Night theme (Charcoal Dark) and when each starts - 07:00 and 19:00 by default. The switch happens at the visitor's local time, so a customer in Sheffield and one in Sydney both get the right one.
A page that has its own theme (next step) keeps it at all hours.
Step 4: Give one page its own theme
Sometimes one page should stand apart - a seasonal offer, or a dark product showcase. Open the page in the editor, go to Page Details and choose a Theme Override. Only that page changes.
Step 5: Re-theme one region with an element override
ACME wants a dark navbar on its light site. That is a job for an element override: a whole theme, applied to just one part of the page.
- Open the Element overrides tab and click Add override.
- Name it
Dark navbar. - Target selector:
#site-navbar(the list suggests common targets). - Adopt a theme here: Charcoal Dark. The panel shows how many colour tokens that changes.
- Click Add, then save.
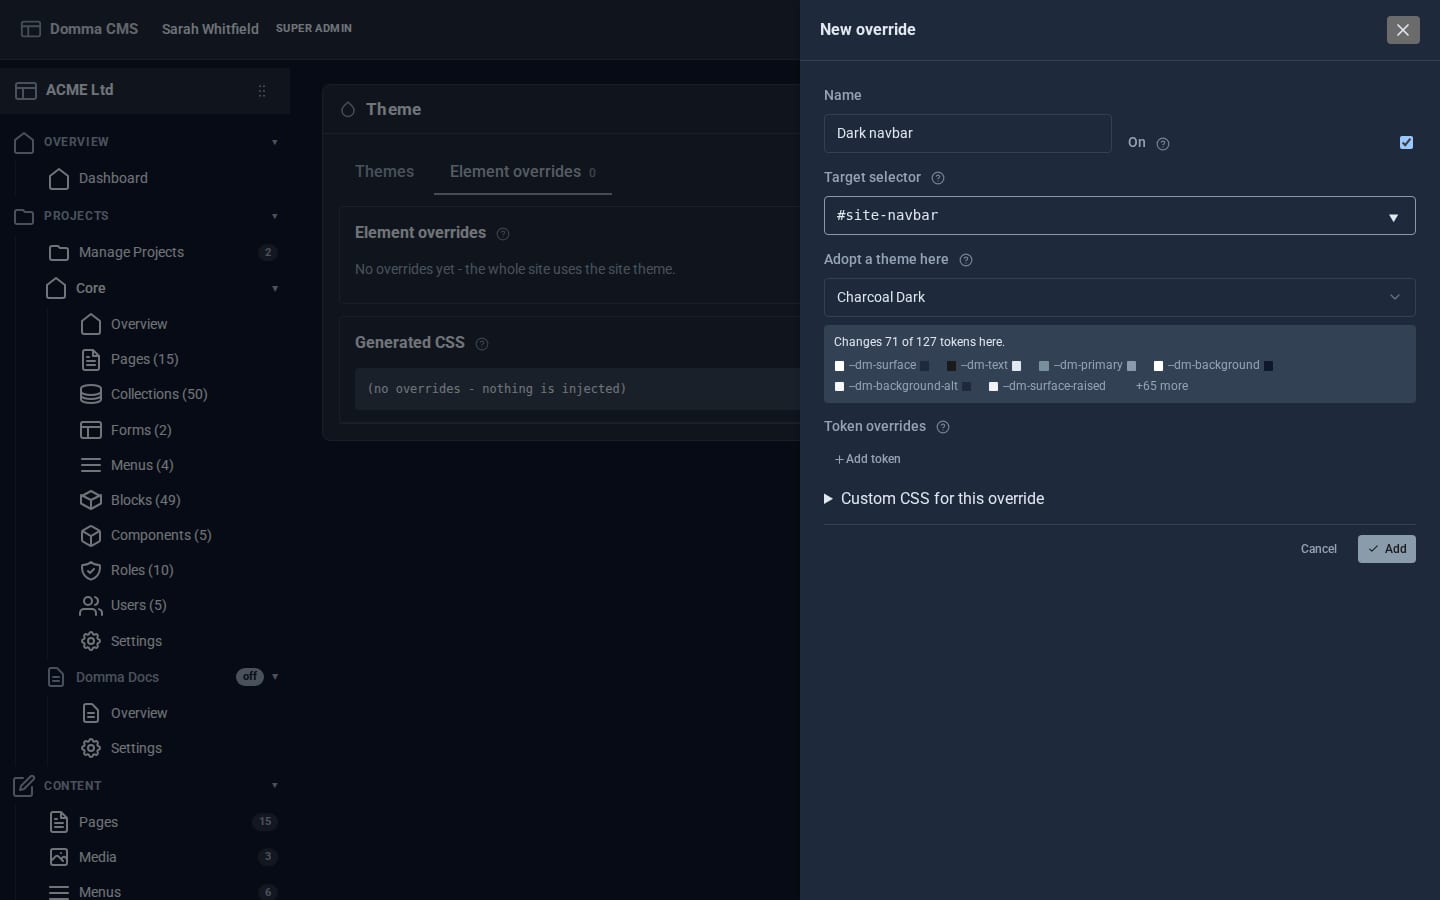
You can also change single tokens (Add token) - just the primary colour of a footer, say - or add a few lines of CSS for that region. The Generated CSS panel shows exactly what will be added to the page, and anything unsafe is refused rather than injected.
Step 6: Let visitors choose
Under Theme switcher, tick Show a theme switcher on the public site. Visitors get a small floating disc of theme colours; set its Position (six anchors) and offsets so it sits clear of your content.
Step 7: Fine-tune with your own CSS
When you need something themes do not cover, add it to System > Site Settings > Custom CSS (or the </> pane in the page editor). It is loaded last on every page, so it always wins. Use the theme's colour tokens - var(--dm-primary), var(--dm-text), var(--dm-border) - rather than fixed colours, and your CSS keeps working in both day and night themes.
What you built
A consistent brand across every page: a chosen theme and font, automatic day and night, a dark navbar island, a page with its own look and a switcher for visitors who prefer something else - without writing a stylesheet.
Keep going
- A landing page in 15 minutes
- Theme Roller - make your own themes from any built-in one (Pro)
- Theme Switcher
Try it on your own site
Everything in this tutorial is free. One command gets you a site to follow along on.