You will build
ACME's Workshop notes blog: posts with categories and pictures, a scheduled post, a layout you like and comments you approve.
You need
- A Domma CMS site you administer
- A first post in mind
Free
The Blog is a free Tool. Blog Pro adds several blogs on one site, dozens of layouts and media embeds.
Step 1: Switch the Blog on
Open Marketplace, find Blog on the Installed tab and switch it on. After the restart, Blog appears in the sidebar with Posts, Categories and Comments, and a Blog link is added to your navbar.
Want to see it working first? The Posts screen's menu has Add sample posts - six posts with covers, removed again in one click.
Step 2: Make categories
Open Categories and add a few: Techniques, Tool care, From the workshop. Each has a name, a slug for its address and a description.
Step 3: Write a post
Open Posts and add one. The editor has:
- Title - the address slug is made from it
- Content in Markdown (or HTML), and an excerpt for listings
- Featured image from the media library
- Categories and tags - tags reuse existing spellings as you type
- SEO title and description
- a layout for this post, with a live preview in any layout
Save keeps it as a draft while you work; Publish puts it live now. Writers with the Blog Author role can draft and edit their own posts; a Blog Editor publishes.
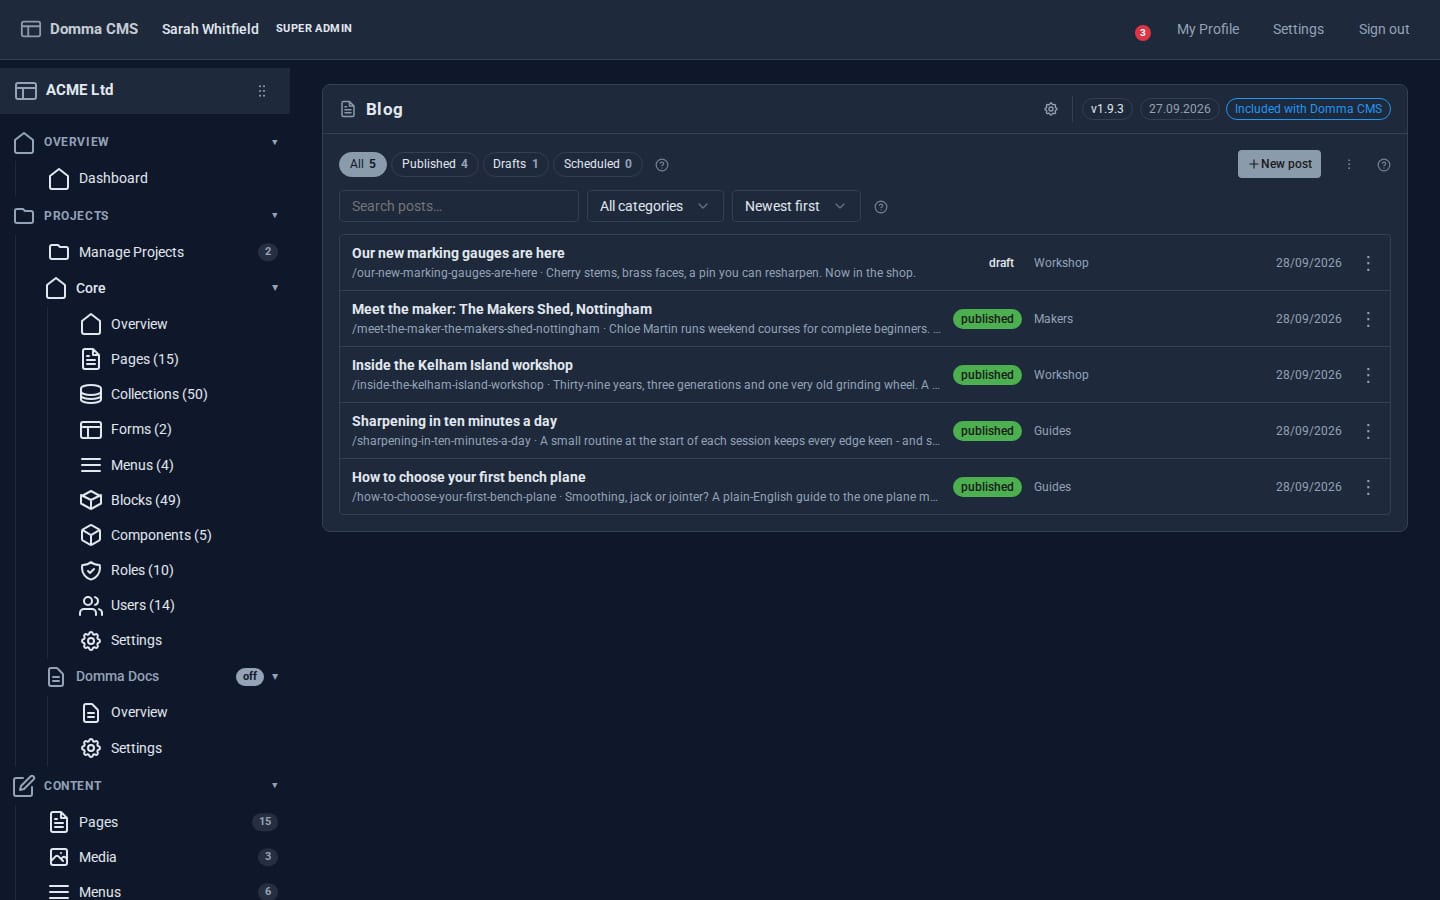
Step 4: Schedule it
Instead of Publish, click Schedule and pick a date and time (Scheduled for). The post goes live by itself when the time passes - there is nothing to run. Move to drafts takes a live or scheduled post off the site again. The Posts list filters All, Published, Drafts and Scheduled.
Step 5: Choose the look
Open the Blog's settings (the cog in the banner):
- Default post layout - Classic, Feature (a full-width picture), Minimal, Sidebar (with a sticky contents list), Split or Essay (serif type, drop cap, pull quotes)
- Listing display - Cards, List, Magazine (newest post as the lead) or Compact, and whether readers may switch
- posts per page, related posts, the blog's address (
/blogby default) and the RSS feed length
Layouts are ordinary blocks, so you can restyle them in Data > Blocks. Every post also gets a reading time, a table of contents, a reading-progress bar, share links and newer/older links.
Step 6: Moderate comments
Turn comments on in settings, with hold comments for approval. New comments wait in Comments; the sidebar badge counts them and you are notified. Approve, reject, mark as spam or delete. A hidden spam trap keeps most bots out.
Step 7: Show posts elsewhere
Put your latest posts on the home page:
[blog-featured /]
[blog-grid count="3" cols="3" /]
[blog-categories show-counts="true" /]
Posts are added to your sitemap, and readers can follow along at /blog/feed.xml.
What you built
A proper blog on your own site: categorised posts with pictures, scheduling, a layout and listing style of your choice, moderated comments, an RSS feed and posts on your home page.
Keep going
Try it on your own site
Everything in this tutorial is free. One command gets you a site to follow along on.